


OBS Guide - Video
Before installing OBS please do a speed test using http://speedtest.xcdnpro.com This will test your connection with our servers.
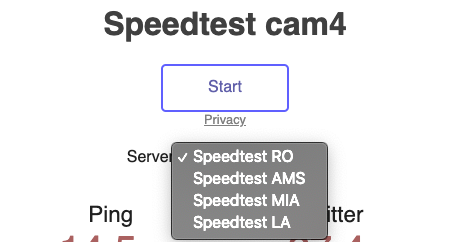
Based on your results here are our recommendations regarding the resolution and Bitrate (you will need to set this once you configure OBS)
| Upload Speed | Resolution | Bitrate |
| higher than 9Mbits /s | 1920x1080 | 4000 Kbps |
| between 5Mbits and 9 Mbits | 1280x720 | 3000 Kbps |
| between 3Mbits and 5Mbits | 960x720 | 2500 Kbps |
| between 2Mbits and 3Mbits | 800x600 | 2000 Kbps |
| less than 2Mbits | 640x480 | 1000 Kbp |
- Download OBS software from https://obsproject.com/download
Please Note: There is a phishing campaign at the moment that encourages downloading OBS from non-official sites. Please make sure you download the version available on the official website only
- Select the Operating System (Windows / MacOS / Linux)
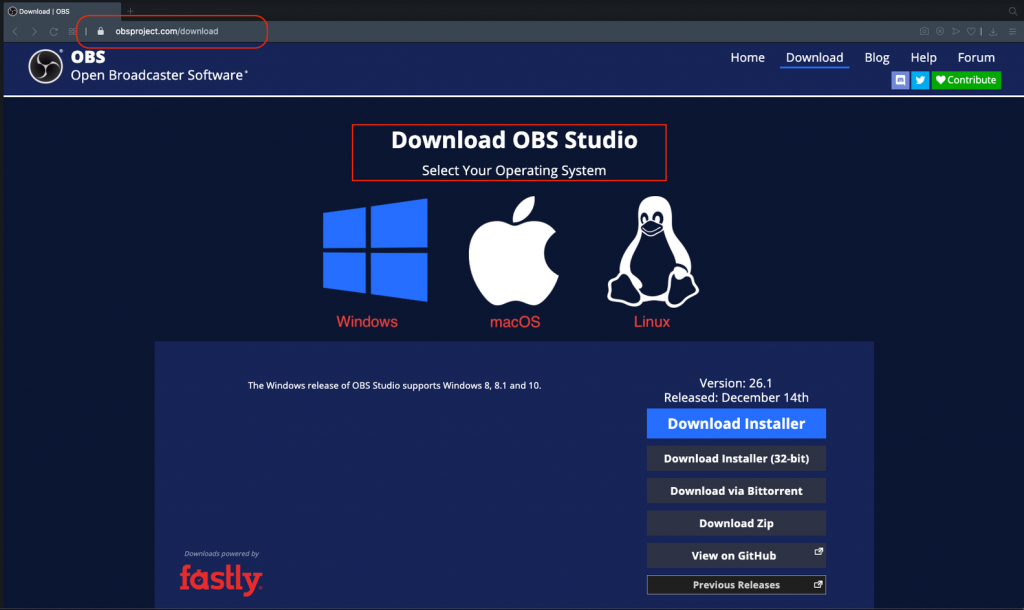
- Click on Download Installer
- Once the download is finished, install the application
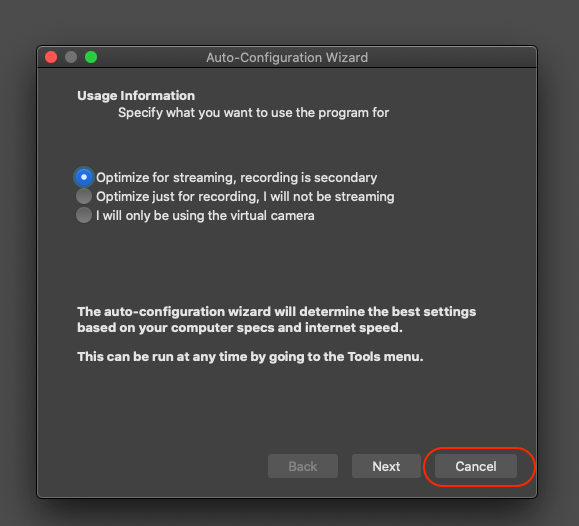
- Open OBS software
- The first time you open OBS you will be asked if you want to Auto Configure OBS → Click CANCEL
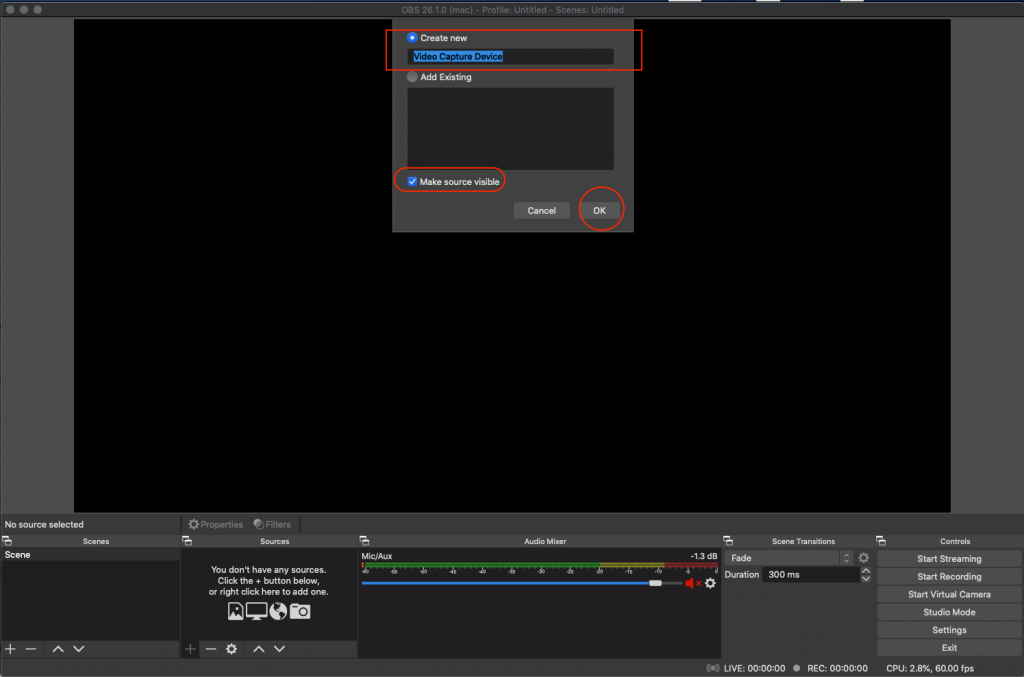
- Click on + To add a new Video Source
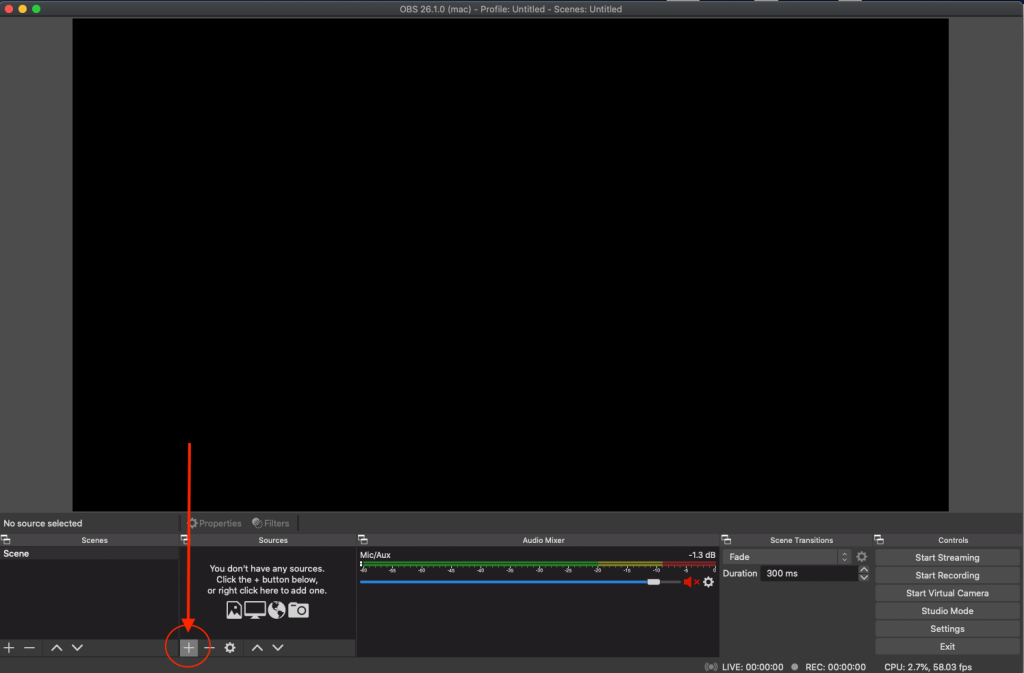
- Select Video Capture Device
- Input desired name
- Check "Make source visible”
- Click OK
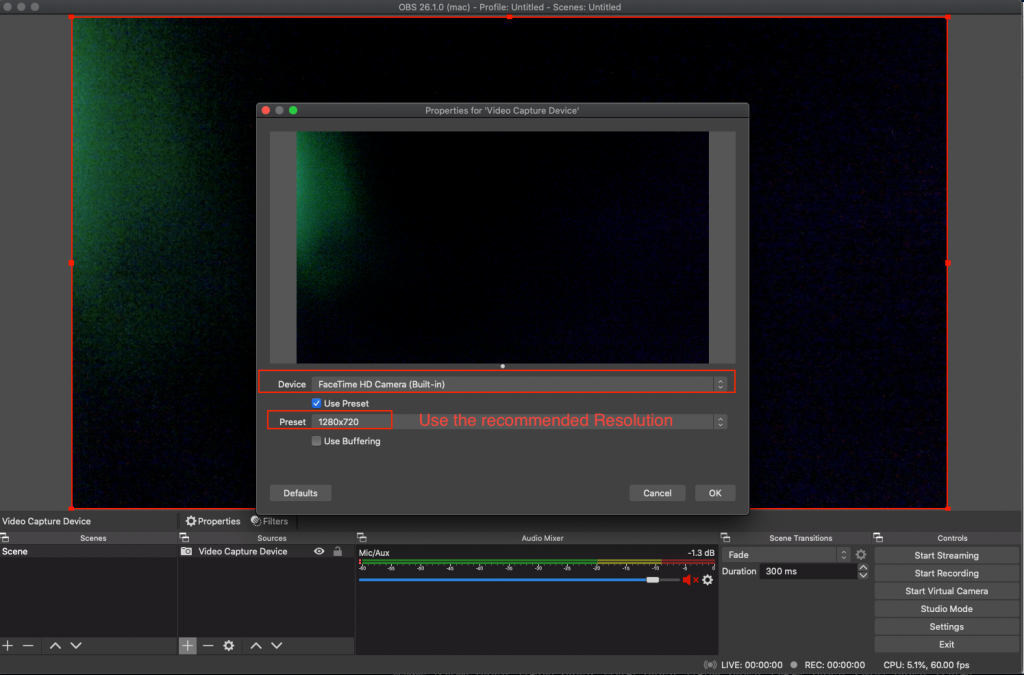
- Device: Select desired Webcam (ex: Logitech C920)
- Check “Use Preset”
- Resolution: Select the Recommended resolution based on the speed test
- Frame rate: 30
- Click OK
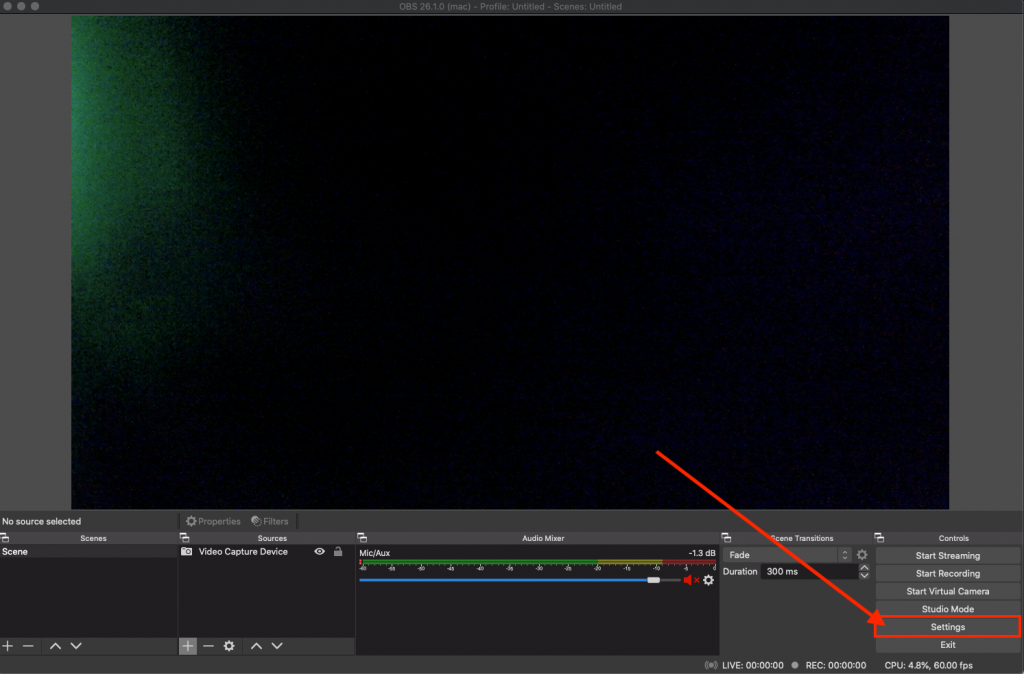
- Click On SETTINGS
- Choose the STREAM TAB
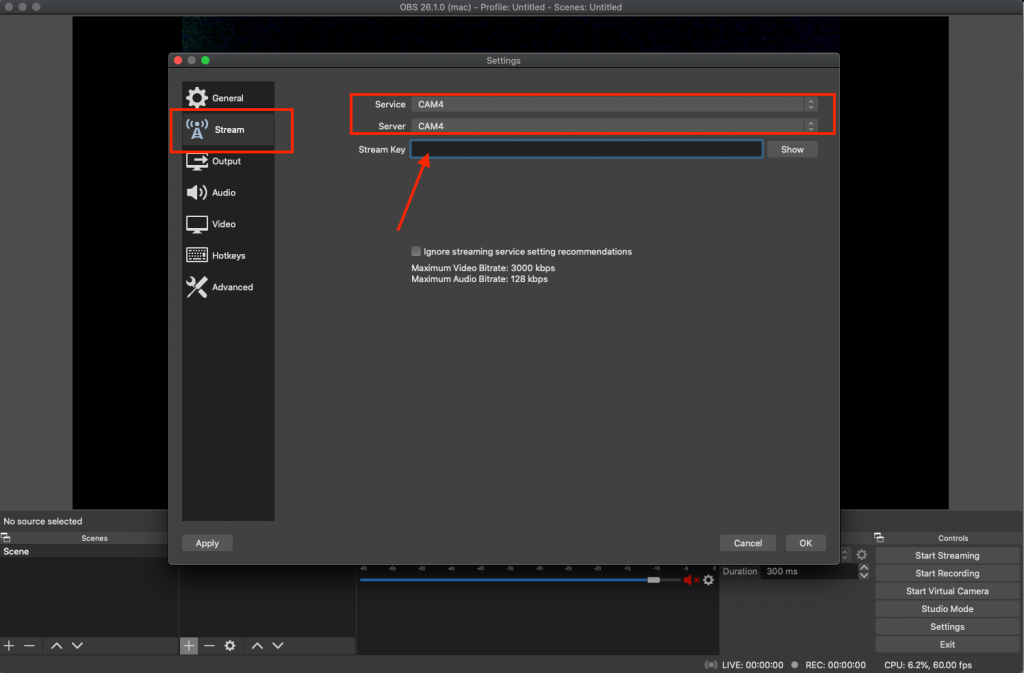
-
Select Service → Show All… → CAM4
-
Select Server → CAM4
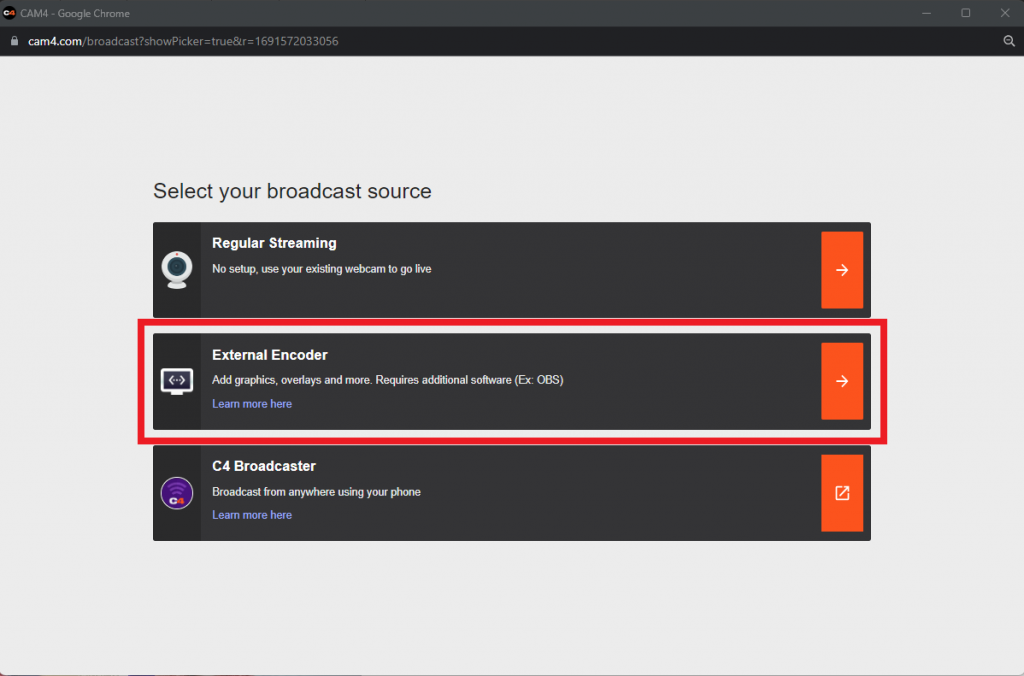
- In order to get the Stream Key you need to open the Broadcast Window on Cam4
- Choose External Encoder
- Choose Get Stream Key
- Copy the Stream Key
- Choose External Encoder

- Choose Get Stream Key

- Copy Stream Key
- Paste the Stream Key from CAM4 into the input field

- Choose the OUTPUT TAB
Go to Output Mode - Select Advanced from the dropdown list
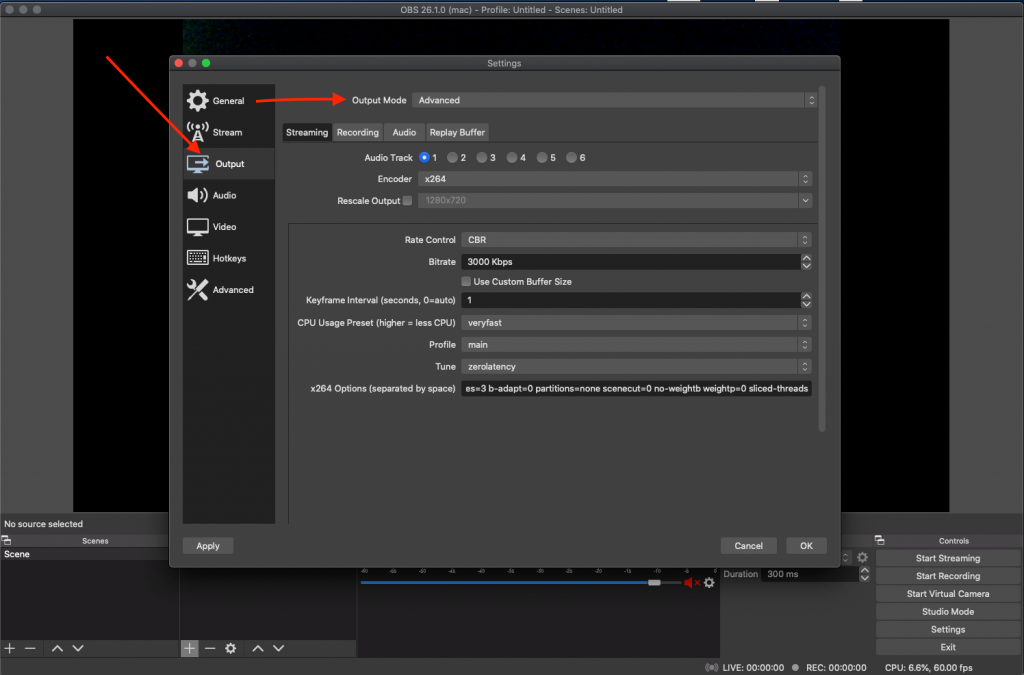
IF Encoder is x264 use the following settings:
- Rate Control: CBR
- Bitrate: Based on internet speed (see above table)
- Keyframe Interval (seconds, 0=auto): 1
- CPU Usage Preset (higher=less CPU): veryfast or superfast (depending on hardware)
- Profile: main
- Tune: zerolatency
- x264 Options (separated by space): bframes=0
IF Encoder is QuickSync use the following settings:
- Check the box for Enforce streaming service encoder settings
- Target usage: balanced
- Profile: main
- Keyframe Interval (seconds, 0=auto): 1
- Async Depth: 1
- Rate Control: CBR
- Bitrate: The one recommended (see above table)
- B frames: 0
- Check the box for Content Adaptive Quantization
- Choose the VIDEO TAB
- Base (Canvas) Resolution: Use the recommended resolution based on the speed test (ex: 1280x720)
- Output (Scaled) Resolution: Use the same resolution as the Base (Canvas) Resolution
- Downscale Filter: Bilinear
- Common FPS Values: 30
- Choose the ADVANCED TAB
- Scroll down to Network Area and check the following box: “Dynamically change bitrate to manage congestion”
- Click OK
- Click Start Streaming
- Open Broadcast window on CAM4 → Select External Encoder
- Allow flash (if it asks for it 1.1)
- Click Start Broadcast (1.2)
Related Articles


